Windows Media Player is a free built-in tool made by Microsoft which can suit you well for almost all of your audio and video needs in the means of playing audio and video files located on your computer and media connected to it.
Well, as the media connected to it goes, it appears that Windows Media Player sometimes struggles with playing files located on the DVD. This is difficult to solve in some cases as Windows Media Player for Windows older than and including Windows 8 has dropped some of its functionality but here are some solutions which can help you:
Preparation: Uninstall Recently Installed Suspicious Tools
If you have recently installed any new tools which may have something to do with DVD, video and audio editing, etc; or if new updates have been installed without your knowledge, it would be helpful to remove them for now in order to see if they are causing the error.
- First of all, make sure you are logged in with an administrator account as you won’t be able to uninstall programs using any other account.
- Click on the Start menu and open Control Panel by searching for it. Also on Windows 10, you can click on the gear icon in order to open Settings.
- In Control Panel, select to View as: Category at the top right corner and click on Uninstall a Program under the Programs section.

- If you are using the Settings app, clicking on Apps should immediately open a list of all installed programs on your PC.
- Locate the Change your view button and set it to Details. Now you can simply click on the Installed On tab in order to sort the programs on your computer by the date they were installed on.

- Locate any programs which may have had something to do with DVD, audio, or video or generally any suspicious files. In some cases it was Stoik Media Converter and similar tools.
- Click the Uninstall button after selecting the tool you want to uninstall. A message will pop up asking whether you want to confirm your choice so make sure you confirm it.
- Click Finish when the uninstalling process finishes, restart your computer and check to see if the problem is solved.
Solution 1: Repair the Media Encoder
Unfortunately, this solution can only be applied to versions of Windows older than and including Windows 7 since the Windows Media Encoder entry you will need to repair is available only for those versions of Windows. Still, if you are running Windows 7 or older, be sure to check out this solution.
- Make sure you have logged in with an admin account as you won’t be able to repair anything using any other account privileges.
- Click on the Start menu and open Control Panel by searching for it. In Control Panel, select to View as: Category at the top right corner and click on Uninstall a Program under the Programs section.
- Locate the Windows Media Encoder entry on the list and click on it once. Click on the Repair button above the list and confirm any dialog boxes which may appear. Follow the instructions on-screen in order to repair Windows Media Encoder and restart your computer afterwards. Check to see if Windows Media Player is not able to play DVDs.
Solution 2: Update Your Sound and Video Drivers
This is definitely one of the oldest methods in the book but it’s definitely true that updating drivers can solve at least a third of all Windows issues, especially the ones which seem to appear out of nowhere.
Programs and operating systems evolve and your devices need to evolve along with drivers which are still being released, even for old devices. Follow the instructions below in order to update your sound and video drivers:
- Select the Start button, type Device Manager, and select it from the list of results. Alternatively, you can use the Windows Key + R key combination and type in devmgmt.msc in the box. Click OK afterwards.

- Expand one of the sound and video categories to find devices to update, then right-click (or tap and hold) it, and select Update Driver. There are several sections you will need to visit, including: Audio inputs and outputs, Display adapters, DVD/CD-ROM drives, and Sound, video, and game controllers. The process may be long but it’s important to keep your drivers updated.

- Select Search automatically for updated driver software. If Windows doesn’t find a new driver, you can try looking for one on the device manufacturer’s website and follow their instructions. You should be able to search by the name of your laptop or your PC as well.
Note: If you are using Windows 10, latest drivers are often installed alongside Windows updates so make sure you keep your computer’s operating system up to date. Windows Update is run automatically on Windows 10 but you can check if there are new updates by following the instructions below.
- Use the Windows Key + I key combination in order to open Settings on your Windows PC. Alternatively, you can search for “Settings” by using the search bar located at the taskbar or click the gear key which will appear after clicking the Start menu button.
- Locate and open the “Update & security” section in the Settings app. Stay in the Windows Update tab and click on the Check for updates button under the Update status section in order to check whether there is a new version of Windows available.

- If there is one, Windows should proceed with the download process automatically. Please be patient for the update to install and check to see if Windows Media Player is now working with DVDs properly.
Solution 3: Install a Proper Codec Pack
This solution is also applicable only to older versions of Windows as this functionality has been emitted from the latest versions of Windows OS. Frankly, Windows Media Player is a poor choice on Windows 8 and 10 and should be avoided anyway. This method consists of installing the proper codec pack and locating it in Windows Media Player.
We recommend the AC3Filter codec as we have users confirming that his one worked for them. Still, you can choose any codec pack which will do the job.
- Visit their official website and click on AC3Filter 2.6.0b Full in order to start the download of the full codec. It’s free and open source, making it a great choice.

- Double-click on the executable file you just downloaded and make sure you follow the instructions on-screen in order to proceed with the installation process.
- Once the codec has installed, restart your computer in order to apply the changes and open Windows Media Player by searching for it in the Start menu or by browsing your computer (C >> Program Files >> Windows Media Player).
- Click on the Organize button at the top left part of the window and click on Options. From there, navigate to the DVD tab and click on the Advanced button. You should see AC3Filter as the codec of choice.

- The interesting part is that you can’t set which codec is to be used when you try to play a file from a DVD and they will be sorted by priority. This priority can be changed but it’s much easier to simply uninstall the other codec pack you may have installed as having several of them may cause instability and conflicts.
- Check to see if the problem is solved and if you can play your videos and songs from a DVD without issues.
Solution 4: Reinstalling Windows Media Player
Reinstalling the program is usually the most logical move of everyone having issues with a program and plenty of users did that and it didn’t work. However, it has worked for people who have followed this set of steps, especially if you were able to play DVDs on your Windows PC until a certain point in time.
First of all, you should perform this Command Prompt tweak which can even solve the problem on its own so make sure you check to see if the issue has been resolved after getting through the command:
- Search for “Command Prompt”, right-click on it, and select the “Run as administrator” option. Copy and paste the following command and make sure you click Enter afterwards.
net localgroup “Administrators” “NT Authority\Local Service” /add
- On your keyboard, use the Windows Key + R key combination to open the Run dialog box. Also, you can search these directly in the Start menu if your Windows OS supports it.
- Type in Control Panel and click OK in order to open it. Make sure you change the view in Control Panel to View by: Category and click on Uninstall a program under the Programs section.
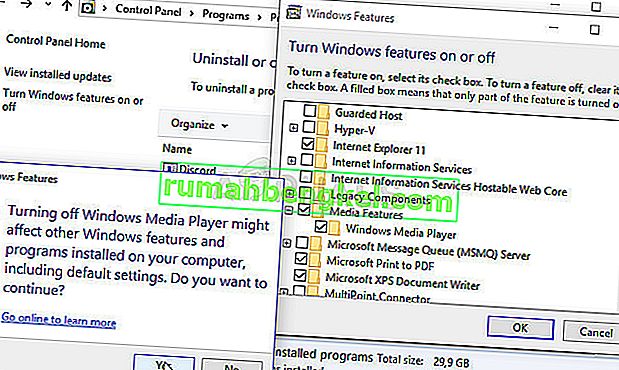
- At the right side of the screen which opens, click on Turn Windows features on or off and locate the Media Features section. Expand the list and look for Windows Media Player. Uncheck the box next to it, click OK, and confirm any dialog boxes which appear. RESTART your computer before proceeding further!
- After that, navigate to either the Program Files or Program Files (x86) folder in the paritiotion you are using (depending on your PC’s architecture) and delete the Windows Media Player folder (usually C >> Program Files >> Windows Media Player).


- Now you can navigate back to the Windows Media Player entry in the Turn Windows Features on or off window and check the box next to it again which will start the reinstalling process. Restart your computer again after it has finished installing and check to see if the problem is solved!