If your computer has a Conexant audio device and you upgrade it to Windows 10, there is a slight possibility that the computer may no longer be able to play audio following the upgrade. This issue has been known to plague a good percentage of all the users with Conexant audio devices who upgrade their computers to Windows 10. The cause of this problem, in almost all cases, is that the Conexant audio drivers on the affected computer are incompatible with Windows 10, and Windows was unable to upgrade the drivers during the Windows 10 upgrade.
This issue can be fixed by simply updating the Conexant audio drivers on the affected computer, but since that didn’t automatically happen during the Windows 10 upgrade, you are going to have to do it manually. In order to do so, you are going to have to first download a driver package for your computer’s Conexant audio device that is not only newer than the one already installed but is also guaranteed to be compatible with Windows 10. Since Conexant does not release drivers for its audio devices on its own website, you are going to have to download the new driver package from the official Support website of the affected computer’s manufacturer (Acer or HP – for example).
Method 1: Update Driver Manually
Once you have downloaded and the new driver package for the affected computer’s Conexant audio device, you need to install it. In order to install the new driver package, yo
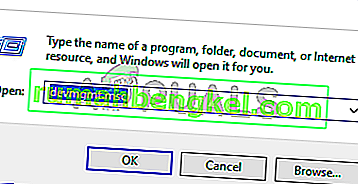
- Press Windows Logo key + R to open a Run
- Type devmgmt.msc into the Run dialog and press Enter to launch the Device Manager.
- In the Device Manager, double click on the Sound, video and game controllers section to expand it.
- Right-click on the Conexant audio device and click on Update Driver Software… in the context menu.
- Click on Browse my computer for driver software.
- Click on Browse….
- Navigate to the folder in which the new driver package is located and click on the folder to select it.
- Click on OK.
- Click on Next, and then wait for the wizard to locate the new driver package and install it.

Once the new driver package for the affected computer’s Conexant audio device has been installed, restart it and, if all went well, the sound will have been restored.
Method 2: Disable Audio Enhancements
In some cases, if you have enabled certain sound enhancements, the issue might be triggered. Therefore, in this step, we will be disabling all Audio enhancements. For that:
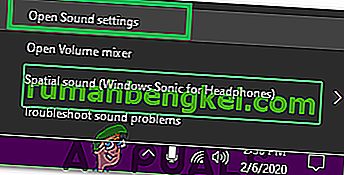
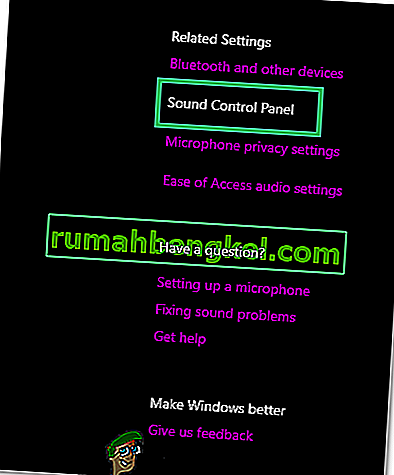
- Right-click on the “Speaker” icon in the bottom left side of the screen and select the “Open Sound Settings” option.
- In the top right side, select the “Open Sound Control Panel” option and right-click on your “Speakers”.
- Select “Properties” from the list and click on “Enhancements” in the next tab.
- Check the “Disable All Enhancements” option and click on “Apply”.
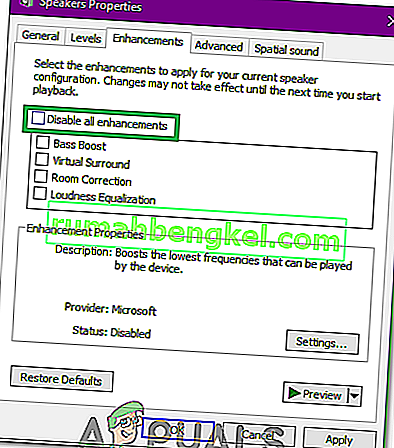
- Select “OK” to close the window and check to see if the issue persists.


Note: You can also try to boot your computer in a clean boot and check if that helps with the issue.
Method 3: Rolling Back Driver
In certain cases, the driver might not be properly installed and compatible with the hardware that is being used by the computer due to which this issue is being triggered. Therefore, in this step, we will be rolling back the driver and then check if the issue still persists. For that:
- Press “Windows” + “R” to open the Run prompt.
- Type in “Devmgmt.msc” and press “Enter”.
- Expand the “Sound, Video and Game Controllers” tab and right-click on the sound driver.
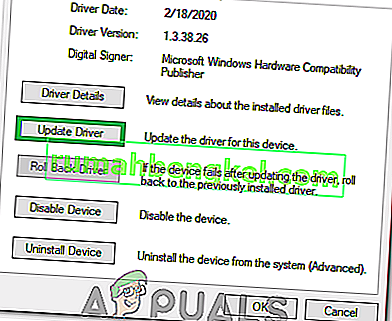
- Select “Properties” from the list and click on the “Driver” tab.
- Haga clic en la opción "Revertir controlador" y siga las instrucciones en pantalla para revertir el controlador a su versión anterior.
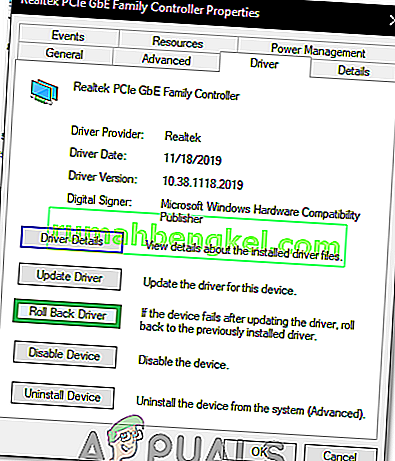
- Después de revertir el controlador, verifique si el problema persiste.


Método 4: uso de audio de alta definición
Los controladores de terceros tienen muchos fallos en Windows 10 y eso se puede ver al observar la gran cantidad de quejas de los usuarios en el sitio web de Microsoft sobre problemas con los controladores. Eso podría ser lo que está mal en su computadora y es posible que esté usando controladores con fallas. Por lo tanto, en este paso, utilizaremos los controladores de audio de alta definición HD predeterminados para su computadora. Para utilizar estos:
- Presione "Windows" + "R" para abrir el indicador Ejecutar.
- Escriba "Devmgmt.msc" y presione "Enter".
- Expanda la pestaña "Controladores de sonido, video y juegos" y haga clic con el botón derecho en el controlador de sonido.
- Seleccione "Propiedades" de la lista y haga clic en la pestaña "Controlador" .
- Haga clic en la opción "Actualizar controlador" y luego seleccione " Buscar software de controlador en mi computadora ".
- Después de eso, en la siguiente pantalla, haga clic en la opción " Permítame elegir de una lista " y seleccione el "Dispositivo de audio de alta definición" en la siguiente pantalla.
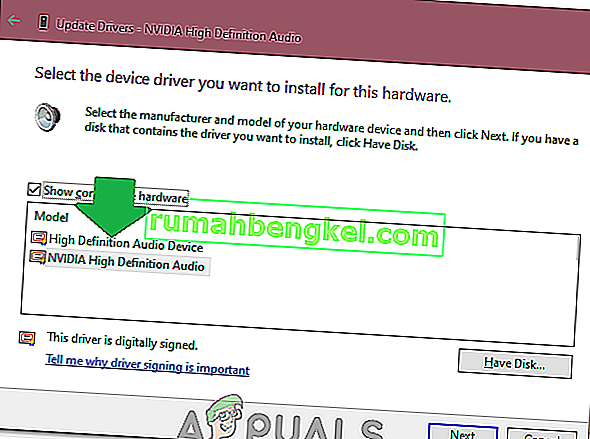
- Haga clic en "Siguiente" y siga las instrucciones en pantalla para instalar el controlador en lugar del de terceros.
- Verifique si el sonido funciona después de hacer esto.
Nota: Si esto no funciona, elija Nvidia High Definition Audio en el sexto paso y vuelva a verificar.


Método 5: cambiar la configuración de la memoria
En ciertos casos, la configuración de la memoria puede estar afectando al controlador al evitar que pueda utilizar suficiente RAM para mantener el audio en funcionamiento. Por lo tanto, en este paso, cambiaremos la configuración de la memoria y la configuraremos en una cantidad específica. Para eso:
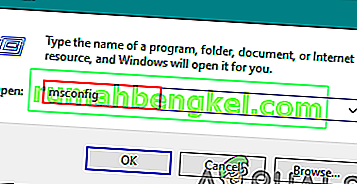
- Presione “Windows” + “R para abrir el indicador Ejecutar.
- Escriba "msconfig" y presione "Enter".
- Haga clic en la pestaña "Arranque" y luego seleccione el botón "Avanzado" .
- En las opciones avanzadas, seleccione la opción “Memoria Máxima” y escribir “3072”.
- Haga clic en "Aceptar" y luego cierre la ventana.
- Verifique si el problema persiste.