Windows 10 es una de las versiones de Windows más esperadas por Microsoft. Aunque Windows 8 creó una nueva tendencia en el mundo del SO de escritorio, tenía algunos problemas de diseño y rendimiento que fueron el foco principal de Microsoft en Windows 10. Por lo tanto, Windows 10 Final Build se reveló el 29 de julio de 2015, para escritorio como así como Smartphones.
Incluyó muchas modificaciones al tener en cuenta las fallas de Windows 8. De hecho, es una versión avanzada de Windows, pero aún así, hay una serie de consecuencias que ocurren todos los días con diferentes usuarios.
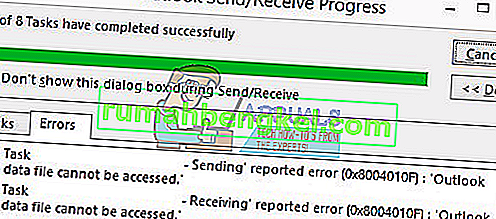
Una parte importante de estas consecuencias son los errores que surgen al intentar realizar una tarea en particular. Varias personas han recibido un mensaje de error al intentar abrir diferentes programas y navegadores dentro de su Windows 10. Este error viene con un mensaje de error que dice: La aplicación no pudo iniciarse correctamente (0xc0000005). Haga clic en Aceptar para cerrar la aplicación . Este error suele ocurrir con los navegadores de Internet, pero no se limita a estos. Cualquier aplicación dentro de Windows puede dejar de responder debido a este error. Por lo tanto, debe arreglarse para que el software esencial vuelva a funcionar.

12/11/2016: Los usuarios informaron que los métodos que se enumeran a continuación también funcionarán en Windows 7.
Razón detrás del error 0xc0000005 de Windows 10:
Hay una serie de razones conocidas que hacen que este error interrumpa las operaciones de varios programas en Windows 10. Una de las razones que se consideran una causa principal es un programa antivirus de terceros que causa conflictos con archivos ejecutables e influye en sus operaciones. Por otro lado, los registros pueden corromperse debido a malware y virus que hacen que los programas se comporten de manera anormal. A veces, los controladores de hardware defectuosos también pueden ser los culpables de este error.
Soluciones para reparar el error 0xc0000005 de Windows 10:
Con base en las razones mencionadas anteriormente, las soluciones son sencillas. Por lo tanto, siga los siguientes métodos para deshacerse de este frustrante mensaje de error.
Reparar archivos de sistema dañados
Descargue y ejecute Restoro para escanear y restaurar archivos corruptos y faltantes desde aquí , una vez hecho esto, continúe con las soluciones a continuación. Es importante asegurarse de que todos los archivos del sistema estén intactos y no estén dañados antes de continuar con las soluciones a continuación.
Método n. ° 1: reparación del programa antivirus
Los programas antivirus pueden influir en los archivos ejecutables de varios programas. Entonces, para solucionar este problema, debe deshabilitar el programa antivirus de terceros para verificar si fue el culpable o no. Tenga en cuenta que deshabilitar los programas antivirus puede resultar en algunas amenazas graves para su computadora cuando se conecta a Internet.
También puede confiar en el software de seguridad propio de Windows, es decir, Windows Defender . Tiene la misma funcionalidad que cualquier otro antivirus. Puede deshabilitar el antivirus navegando a su Configuración y apagando el escudo.

Una vez desactivado, vuelva a comprobar el error. Si aún persiste, pase al siguiente método.
Método # 2: Registros de reparación
El registro es la base de datos central de Windows que su PC utiliza constantemente para ayudarlo a leer muchos archivos y configuraciones diferentes que necesita para ejecutar. Los registros pueden corromperse debido a daños en ciertos archivos necesarios para apilar todo en su lugar. Por lo tanto, la mayoría de los expertos recomiendan que se asegure de hacer una copia de seguridad de su Registro y mantener esta copia de seguridad almacenada en una memoria USB convencional para que pueda revivir su Registro en el estado anterior en caso de corrupción. Pero, si no hizo una copia de seguridad de su Registro, siga estos pasos para corregir los registros y resolver el error 0xc0000005 .
1. Descargue el software de limpieza del registro desde este enlace .
2. Una vez descargado, instálelo con la configuración recomendada. Abra el software una vez finalizado el proceso de instalación.
3. En la interfaz, haga clic en la pestaña Registro presente en el panel izquierdo y haga clic en el botón etiquetado como Analizar en busca de problemas . Comenzará a buscar errores en el registro y, cuando finalice la búsqueda, se activará un botón Corregir problema seleccionado . Haga clic en ese botón y todo se arreglará.

Método n. ° 3: reparación de controladores defectuosos
Los controladores son los programas de software que ayudan a la computadora a comunicarse con el hardware adjunto. Entonces, cuando están dañados, el hardware tiende a causar fallas . Reparar estos buceadores defectuosos puede ayudarlo de varias maneras. Siga los pasos a continuación.
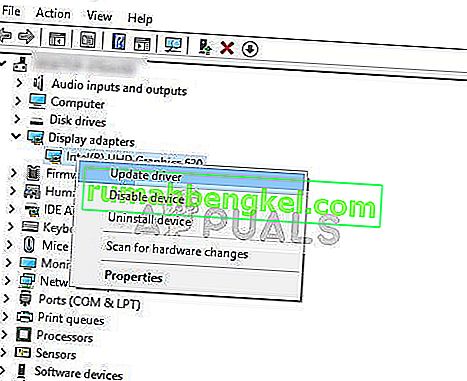
1. Abrir el Administrador de dispositivos por pulsando Win + X y seleccionar de la lista.
2. Dentro del Administrador de dispositivos, desplácese hacia abajo para ver si hay algún hardware con una marca amarilla. Si lo hay, haga clic derecho allí y seleccione Actualizar software de controlador . Si instaló controladores recientemente, vuelva a instalarlos también.

3. En la ventana que aparece después, haga clic en Buscar automáticamente el software del controlador actualizado para permitirle buscar e instalar los controladores automáticamente. En caso de que haya descargado los controladores manualmente, haga clic en la opción siguiente para buscarlos e instalarlos. Una vez finalizado el proceso, verifique el error.

Método # 4: arreglar BCD
Este método debe ser realizado por los usuarios bajo su propio riesgo. Esto funcionó para algunos y no para otros. También deberá volver a activar Windows después de realizar los pasos de esta guía.
- Mantenga la tecla de Windows y Pulse X . Elija símbolo del sistema (administrador)
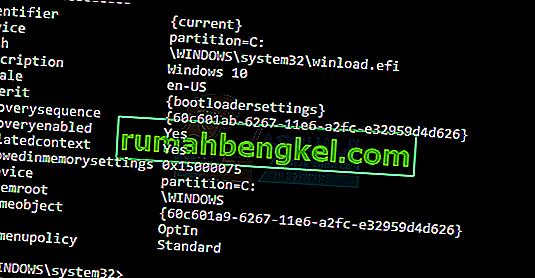
- Escriba " bcdedit" y presione ENTER. Si la ruta del cargador de arranque de Windows es xOsload.exe, debe eliminar algunos archivos y reparar su BCD. Puede ver esto en el campo PATH después de ejecutar el comando " bcdedit".
- Una vez hecho esto, ejecute los siguientes comandos a continuación, algunos pueden regresar no encontrados, pero ignoran los errores y continúan hasta el último. Asegúrese de presionar la tecla ENTER después de cada comando.

Del D: \ Windows \ System32 \ xOsload.exe Del D: \ Windows \ System32 \ xNtKrnl.exe Del D: \ Windows \ System32 \ Drivers \ oem-drv64.sys attrib c: \ boot \ bcd -h -r -s ren c: \ boot \ bcd bcd.old bootrec / rebuildbcd
Método 5: buscar actualizaciones de Windows
Las actualizaciones de Windows a menudo contienen correcciones para algunos errores y fallas, pero también son conocidas por dar paso a nuevos problemas en las computadoras de las personas. Sin embargo, en este paso, buscaremos actualizaciones para su sistema operativo porque Microsoft a menudo parchea cualquier problema que surja de sus actualizaciones. Para hacer eso, siga la guía a continuación.
- Presione "Windows ' + " I " para abrir la configuración de Windows.
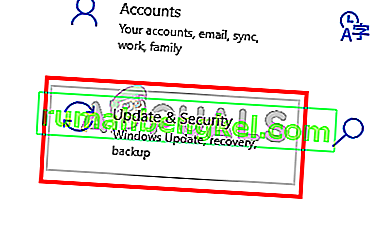
- En la configuración, haga clic en la opción "Actualizaciones y seguridad" y desde el lado izquierdo, seleccione la opción "Actualización de Windows" .
- En la siguiente pantalla, haga clic en la opción "Buscar actualizaciones" y automáticamente le pedirá a Windows que busque actualizaciones disponibles.

- Una vez completada la verificación de actualizaciones, haga clic en el botón "Descargar" para activar la descarga e instalación de nuevas actualizaciones en su computadora.
- Una vez instaladas estas actualizaciones, compruebe si al hacerlo se solucionó el problema en su computadora.


Método 6: Restaurar la computadora
Si acaba de comenzar a tener este problema, es posible que se active debido a una instalación defectuosa del controlador o incluso debido a una aplicación no autorizada que podría haber instalado en su computadora recientemente. Por lo tanto, en este paso, revertiremos el estado de la computadora a una fecha anterior y, con suerte, esto debería solucionar nuestro problema si se debió a las razones mencionadas anteriormente. Para hacer esto:
- Presione "Windows" + "R" para abrir el indicador Ejecutar.
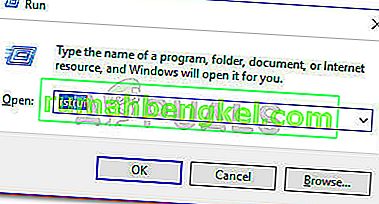
- Escriba "rstrui" y presione "Enter" para abrir la ventana de administración de restauración.
- Haga clic en "Siguiente" y marque la opción "Mostrar más puntos de restauración" .
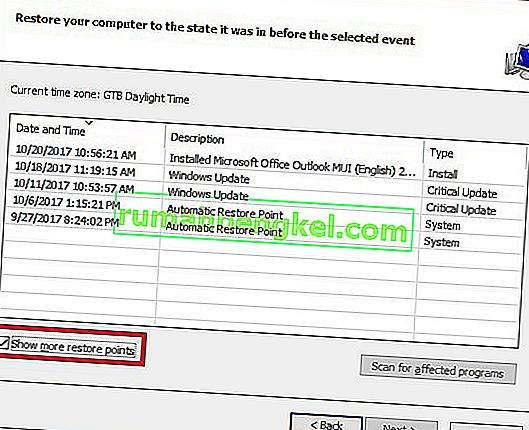
- Seleccione un punto de restauración de la lista que sea anterior a la fecha en que comenzó a ocurrir este problema.
- Haga clic en "Siguiente" nuevamente y siga las instrucciones en pantalla para revertir todo a la fecha seleccionada.
- Una vez completada la restauración, compruebe si el problema persiste.


Método 7: habilitar el firewall
Es posible, en algunos casos, que el error se active porque la aplicación es sospechosa o al menos si se ha marcado como sospechosa y el Firewall de Windows no se está ejecutando en su computadora para validar esto. Por lo tanto, en este paso, nos aseguraremos de que el Firewall de Windows esté habilitado para eliminar este error. Para eso:
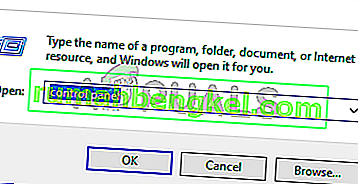
- Presione "Windows" + "R" para abrir el indicador Ejecutar.
- Escriba "Panel de control" y presione "Enter" para iniciar la interfaz clásica del Panel de control.
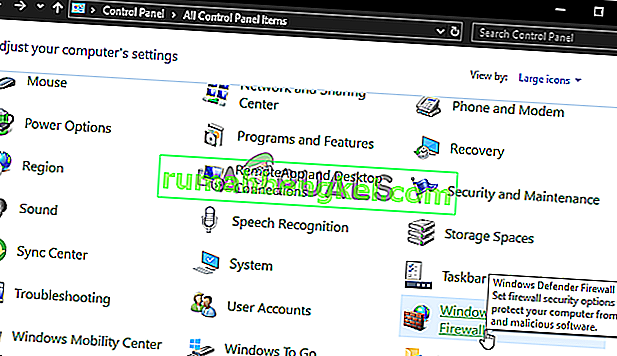
- En el Panel de control, haga clic en la opción "Ver por:" y seleccione el botón "Iconos grandes" .
- Después de hacer esta selección, haga clic en la opción "Firewall de Windows Defender" para iniciar el Firewall y luego seleccione "Activar o desactivar Firewall de Windows Defender".
- Asegúrese de marcar "Activar Firewall de Windows Defender" para ver las dos opciones disponibles para activar el Firewall.
- Después de hacer esta selección, guarde sus cambios y cierre la ventana.
- Después de hacerlo, verifique si el problema persiste.


Método 8: ejecutar el escaneo SFC
In some situations, you might’ve installed a bad driver on your computer or at some point, due to a storage failure, some system files or drivers might’ve been corrupted. Therefore, in this step, we will be running a complete system scan to identify any drivers that are missing signatures or to fix any abnormalities in the system files. For that:
- Press “Windows’ + “R’ to open the Run prompt.
- Type in “cmd” and then press “Shift’ + “Ctrl” + “Enter” to provide admin permissions.Running the Command Prompt
- Type in the following command inside the command prompt and press “Enter” to execute it.
sfc /scannow
- Let the computer scan for any broken or corrupted items and it should automatically replace them with working ones.
- Check to see if doing so fixes the error message.

Method 9: Disabling Data Execution Prevention
Data Execution Prevention is a program that prevents certain programs or executables from being able to run on your computer because it suspects that they might be viruses. Due to this prevention, sometimes, as a false alarm, legit applications might also face issues while trying to run on your computer. Therefore, in this step, we will be disabling this setting from the system configuration panel. For that:
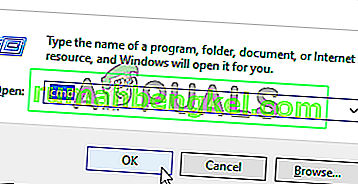
- Press ‘Windows’ + “R’ to open the Run prompt.
- Type in “Control Panel” and press “Enter” to launch the classical control panel interface.

- Inside the Control Panel, click on the “View By:” icon and then select the “Large Icons” option.
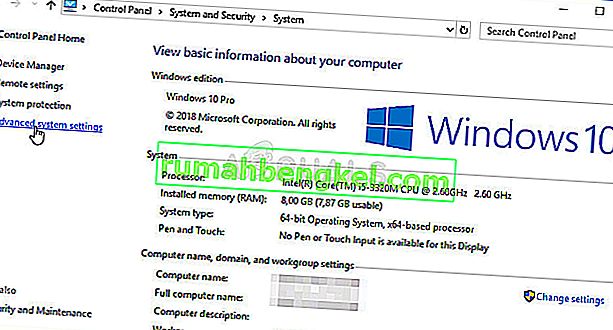
- After selecting Large Icons, select the “System” option.
- Click on the “Advanced System Settings” option on the left side of the screen.
- In the advanced System Settings, click on the “Advanced” tab from the top.
- In the advanced tab, click on the “Settings” option under the “Performance” heading.
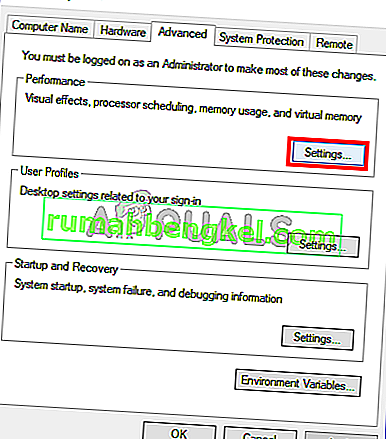
- On the next window that opens up, click on the “Data Execution Prevention” tab, and then select the “Turnon DEP for all programs except thoseI Select” option.
- After that, click on the “Add” option and point to the executable of the application that you are facing issues with.
- This way, that application will no longer come under the jurisdiction of the DEP program.
- Check to see if doing so has fixed the issue.


If the above process is unable to fix the issue, it might be because the executable isn’t the only one being affected by the DEP program. Sometimes the DEP might actually be preventing a herd of executables from being run on the computer and to counter this we will be disabling DEP completely.
Disabling DEP completely cannot be done through any Windows setting and it needs to be done manually through the command prompt. Remember to take this step as a last resort because this can in some cases makes your computer more vulnerable to viruses and malware attacks. In order to disable DEP through the command prompt:
- Press “Windows” + “R’ to open the Run prompt.
- Inside the Run prompt, type in “cmd” and then press “Shift” + “Ctrl” + “Enter” to launch in admin mode.
- Inside the command prompt, type in the following command and press “Enter” to execute it on your computer.
bcdedit.exe /set {current} nx AlwaysOff - Once the command has been executed, run the application that you want to and check to see if the error message still persists.
Method 10: Disable Firewall and Windows Defender
In some situations, the executable that you want to run on the computer might actually be blocked by the Firewall and it would not be able to make contact with its servers this way. Therefore, we will have to allow the executable in our Firewall for both public and private networks which should get it working if the Firewall is preventing it.
In addition to that, sometimes the Windows Defender might prevent the application from running on your computer because its local files might be suspicious and not properly signed. This can be due to a false alarm as well so we will be disabling the Windows Defender for the application as well by adding an exclusion. In order to do that:
- Press “Windows” + “R” to launch the Run prompt.
- Type in “ControlPanel” and press “Enter” to launch the classical control panel interface.
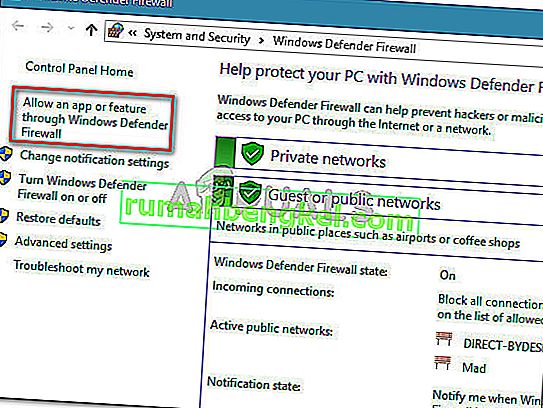
- Click on the “View by:” button, select “Large Icons” and then click on the Windows Defender Firewall option.
- Select the “Allow an app orfeature through the Firewall” button on the left pane and then click on the “Change Settings” button and accept the prompt.
- From here, make sure that you check both the “Public” and the “Private” options for the application and its entries.
- Save your changes and exit out of the window.
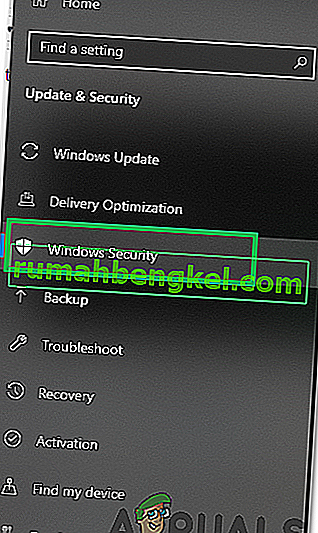
- After that, press “Windows” + “I” to launch the settings and click on the “Updateand Security” option.

- From the left pane, click on the “Windows Security” button and then click on the “Virus and Threat Protection” button.
- Select the “Manage Settings” button under the Virus and Threat Protection Settings heading.
- Scroll down and click on the “Add or Remove Exclusions” button in the next window.
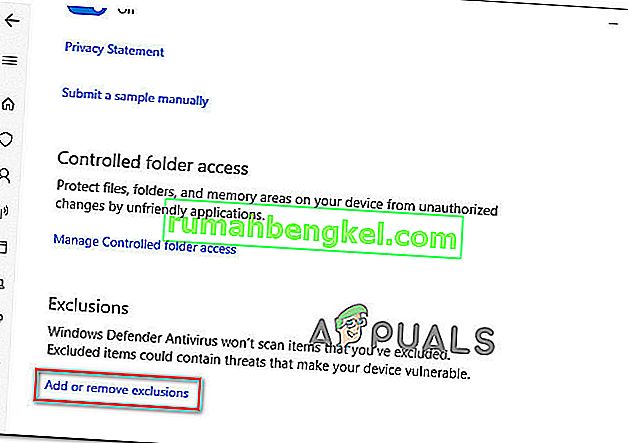
- Click on the “Add an Exclusion” option and select “Folder’ from the File type.
- Make sure to specify the application’s folder with which the issue is occurring and exit out of this window after saving your changes
- Check and see if doing so has fixed the error message.


Method 11: Reinstall Firefox
If you are getting this error while trying to launch Firefox, it might be occurring because the applications haven’t been installed properly on your computer. Therefore, in this step, we will be launching the app management window and uninstalling Firefox after which we will reinstall it completely by downloading it from the Firefox website. For that:
- Press “Windows” + “R” to open the Run prompt.
- Type in “appwiz.cpl” and press “Enter” to open the app management window.

- In the app management window, scroll down and right-click on the “Firefox” application.
- Select “Uninstall” from the list and then follow the on-screen instructions to remove the software from your computer.
- Repeat this step for all instances and bundled applications of the software installed on your computer.
- Make sure to disable any third-party antiviruses at this point to make sure that the software is installed smoothly.
- Head on over to the Mozilla website and click on the download button.

- Click on the downloaded executable and install it on your computer following the on-screen instructions.
- Check to see if doing so has fixed the error message on your computer.


Method 12: Scanning for Malware
It is possible in some cases that the computer has acquired malware that is preventing the user from being able to run all the system functions on their computer. Therefore, in this step, we will be using the default Windows Defender to scan our computer thoroughly for any viruses or malware that might’ve found its way on our computer. For that:
- Press the “Windows” + “I” keys simultaneously on your PC to open the Settings tab.
- Navigate to the Update& Security option and then click on the “Windows Security” button on the left tab.
- After that, click on the “Open Windows Security” and select the “Virus and Threat Protection” option.
- After that, click on the “Scan Options” button below the “Quick Scan” window.
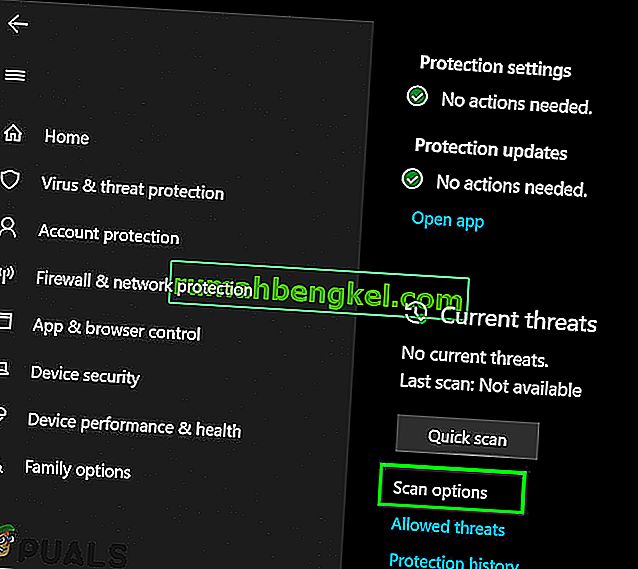
- Click on the “Full Scan” option and then hit the button of “Scan Now”.
- Wait for a few seconds while this process gets completed and then finally check if the error gets resolved now.


Microsoft Security Scanner is an additional tool that you can use to test the system for any further viruses and malware because sometimes the default tool isn’t able to perform the scan properly. Therefore, in this step, if the issue still hasn’t been resolved, we will be using the Microsoft Security Scanner to further make sure for any issues.
- Launch your browser and download the Microsoft Security Scanner from here.
- After downloading the executable, run it on your computer and let it install.
- Accept the License Agreement terms and click on “Next”.

- Select “Full Scan” and click on “Next”.
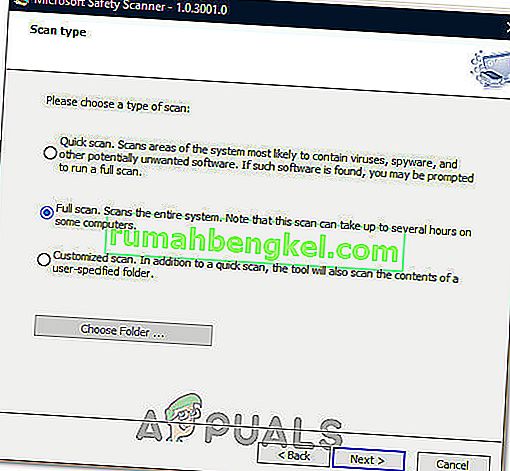
- After you opt for a full scan, the software will start scanning your entire computer to look for any malware or viruses that might’ve disguised themselves as normal executables or applications.
- After this scan has been finished, check to see if the error message still persists.


Method 13: Install Missing Drivers
It is possible in some situations that your device is missing certain drivers due to which this particular issue is being triggered on your computer. Therefore, we will be checking for any missing drivers and then we will check to see if the error is fixed. In order to do this, follow the guide below.
- Download Driver Easy on your computer.

- Run the downloaded executable and install the software on your computer.
- Run the check and see if there are any missing drivers on your computer.
- Install these missing drivers and then install them either manually or automatically using the Software.
- After installing all the missing drivers, check to see if the issue still persists.

Method 14: Reconfigure Registry
It is possible that in some cases, you haven’t properly configured all the registry settings or that you unknowingly configured something incorrectly. Therefore, in this step, we will be reconfiguring our Registry to fix a certain key that sometimes, if misconfigured, causes this particular error on Windows. In order to do this, follow the guide below.
- Press “Windows” + “R” to open the Run prompt.
- Type in “regedit” and press “enter” to launch the registry editor.

- Inside the registry editor, navigate to the following location.
HKLM\SOFTWARE\Microsoft\Windows NT\CurrentVersion\Windows\AppInit_Dlls
- Double click on the “LoadAppInit_DLLs” entry on the right side of the screen.
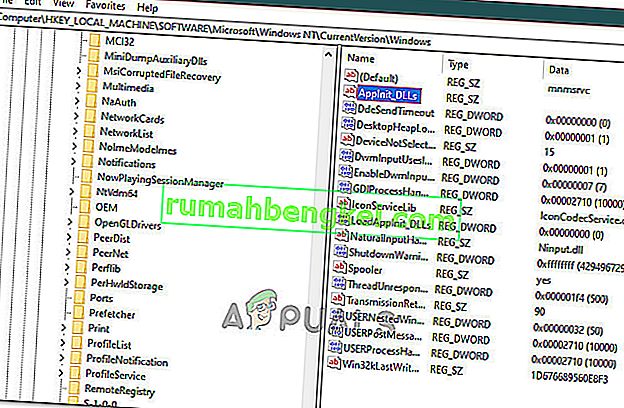
- Change the value of this registry from “1” to “0”.
- Save your changes and exit the registry editor.
- Check to see if doing so has fixed the error.


Method 15: Update Disk Drivers
In some cases, the Disk Drivers that are being used to control your Storage and other Disks installed on the computer might have been outdated due to which the error is being triggered. Therefore, in this step, we will first be opening the Device Management Window and from there, we will be updating these drivers. In order to do so, follow the steps mentioned below.
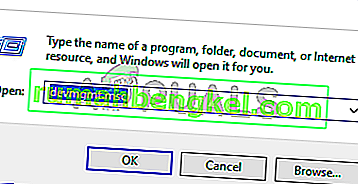
- Press “Windows’ + “R” to open the Run prompt.
- Type in “Devmgmt.msc” and press “Enter” to launch the device management window.
- In the Device Manager, double click on the “DiskDrives” option to expand it.
- Right-click on the storage device listed and select the “Update Driver” option.
- Select the “Search Automatically for Drivers” option and let the setup search.
- If there are any drivers available, Windows will automatically check for them and install them on your computer.
- Check to see if doing so has fixed the issue.


Method 16: Disabling Automatic Updates and Uninstalling Updates
It is possible in some cases, that this error is stemming from a faulty update install. Microsoft is notorious for pushing out updates that aren’t properly customized to work for all hardware combinations and often go on to break things instead of making them better. Therefore we will make sure that the recent update isn’t installed on our computer.
In order to do this, we will have to first disable automatic updates on our computer and then we will be uninstalling the recently installed updates. Make sure to back up any important data that you don’t want to lose just in case this goes bad.
- Press “Windows” + “R’ to open the Run prompt.
- Type in “service.msc” and press “Enter”.

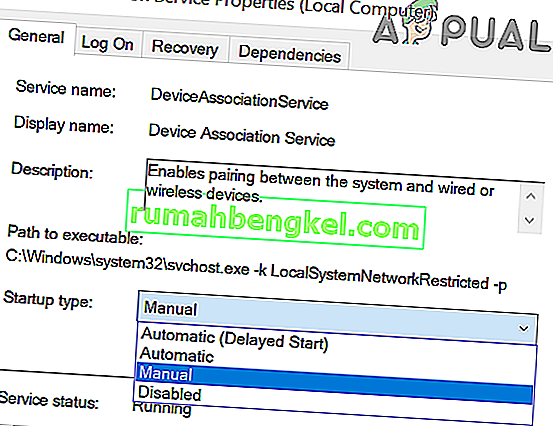
- Scroll through the list and double click on the “Windows Update” service.
- Click on the “Stop” button and then click on the “Startup Type” dropdown.
- Select “Disabled” from the list and select the “Apply” button from the window.
- Click on “OK” to close out of this window.
- Check to see if doing so has stopped your computer from updating.


After stopping the computer from updating, we will now be uninstalling the recent updates that have been installed on your computer. For that:
- Press “Windows” + “I” buttons to open the settings.
- In settings, click on the “Update and Security” option and then select the “Windows Update” button from the left pane.

- In the Windows Update, click on the “View Update History” option.
- In the Update History, click on the “Uninstall Updates” option and it should take you to the uninstallation screen where all the recently installed updates will be listed.
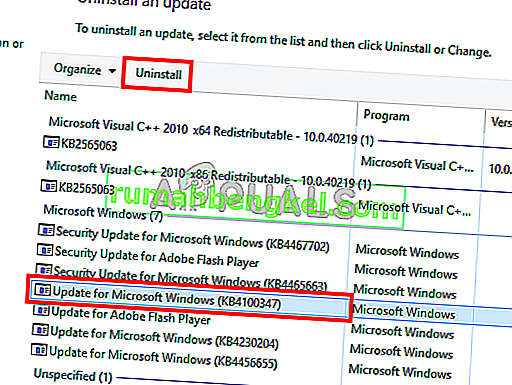
- From the list, right-click on the update that was installed recently and caused this error on your computer.
- Right-click on this update and select the “Uninstall” button to remove it completely from the computer.
- Follow through with the on-screen instructions.
- Check to see if uninstalling has fixed this issue.


Additional Fixes:
- In addition to some of the recommendations given above, you should try to check if there are any bad memory modules (RAM) installed on your computer which can be a cause of this.
- Además, asegúrese de verificar si no ha overclockeado su RAM a un nivel más allá del límite recomendado. Si lo ha hecho, intente devolverlo a los valores predeterminados de fábrica y verifique si eso soluciona su problema.