7 Days to Die crashes are often graphics-related. For example, it often crashes if you are using the wrong version of DirectX which is not recommended for your setup. A graphics settings named Motion blur can also cause the game to crash on certain setups regardless of how well it can handle the game.

Basic troubleshooting won’t get you that far and you should definitely check out the list of possible causes we prepared below:
What causes 7 Days to Die Crash?
- DirectX version – The game simply crashes when a wrong version of DirectX is used combined with your setup. The best thing you can do is to force the use of DirectX 10 for the game.
- Motion blur – Motion blur is a graphics setting that provides smoothness and makes the game appear more cinematic. However, this option can also cause 7 Days to Die to crash so consider turning it off!
- The 64-bit version of the game is not working – Under certain circumstances, the 64-bit version of the game simply fails to work on your 64-bit Windows installation. Forcing the download of the 32-bit version can be complicated but it might be the only way to resolve the problem.
How to Fix Stop 7 Days to Die from Crashing?
1. Force the Use of DirectX 10
Many users have reported that the game struggles to run properly when you use a version of DirectX other than DirectX 10. This setting can be changed quite easily because of the Steam client and you should definitely start troubleshooting the game with this easy and useful method. Follow the steps below to force the use of DirectX 10!
- First of all, you should open your Steam client by double-clicking its icon on the Desktop. You can also search for it in the Start menu.
- Click the Windows key or the Start menu button from the bottom left corner of your screen, type “Steam” and left-click the first result which will appear.

- No matter how you decide to run it, click the Library button from the top part of the window and look for 7 Days to Die in the list of games you own in your Steam library. Right-click its icon and choose Properties from the context menu.
- Make sure you stay in the General tab and click the Set Launch Options button inside. Make sure you type the launch option below. If there are other launch options located inside, make sure you separate them with a blank space.
-force-feature-level–10–0

- Click the OK button in order to apply the changes you have made. Reopen the game and check to see if the crashes still occur constantly!
2. Turn off Motion Blur
Motion Blur is a problematic feature of the game. Many users have actually reported that disabling the feature completely manager to resolve the problem so we really recommend you try this out and see if the game still crashes consistently.
- Open the game by double-clicking its icon on the Desktop or by searching for it in the Start menu. If you Steam client is open, navigate to the Library tab, right-click the game’s entry in the list, and choose Play Game from the list of options that will appear.
- After the game opens to a home screen, click Options and click Video in order to open graphics settings.

- In the right pane, locate the Motion Blur option, click the arrow next to it to open the list of options and set it to Off. Click the Ok or the Apply button in order to apply the changes and see if the crashing problem persists!
3. Verify the Integrity of Game Files
Verifying the integrity of game files is an option available for any Steam game you own in your Steam Library. Basically, this will scan the game’s installation folder and look for missing or corrupt files. After that, these files are redownloaded. This method can resolve numerous Steam game problems and users have reported that they were able to resolve the constant crashing issue simply by following the steps we have prepared below!
- First of all, you should open your Steam client by double-clicking its icon on the Desktop. You can also search for it in the Start menu.
- Click the Windows key or the Start menu button from the bottom left corner of your screen, type “Steam” and left-click the first result which will appear.
- No matter how you decide to run it, click the Library button from the top part of the window and look for 7 Days to Die in the list of games you own in your Steam library. Right-click its icon and choose Properties from the context menu.
- Asegúrate de navegar hasta los archivos locales. Haz clic en el botón Verificar la integridad de los archivos del juego y espera a que la herramienta escanee la carpeta de instalación del juego en busca de archivos faltantes.

- La herramienta debería proceder a volver a descargar los archivos que faltan. Una vez que se haya completado el proceso, asegúrese de volver a abrir 7 Days to Die y verifique si el problema persiste.
4. Descargue la versión de 32 bits de Steam con SteamCMD
SteamCMD se puede utilizar para instalar manualmente diferentes herramientas, incluida la versión de 32 bits de ciertos juegos. Usarlo se siente como usar el símbolo del sistema, pero no se preocupe, hemos preparado todos los comandos que necesitará usar para intentar usar la versión de 32 bits del cliente Steam y, posteriormente, el juego. ¡Mira los pasos a continuación!
- Haga clic en este enlace para descargar el archivo ZIP SteamCMD . Tenga en cuenta que la descarga comenzará tan pronto como haga clic en el enlace. Cree una carpeta para SteamCMD y asegúrese de extraer el contenido del archivo ZIP allí.
- Después de ejecutar SteamCMD por primera vez, se actualizará automáticamente e iniciará la solicitud de nuevos comandos. Si desea acceder a ella más tarde manualmente, asegúrese de que abra un símbolo del sistema ventana mediante el uso de la combinación de teclas tecla de Windows + R .
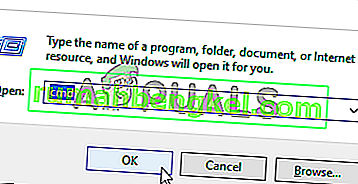
- Esto abrirá un cuadro de diálogo Ejecutar . Asegúrese de escribir " cmd " en el cuadro y haga clic en el botón Aceptar para abrir el símbolo del sistema. También puede buscarlo después de abrir el menú Inicio .
- Una vez dentro del símbolo del sistema, escriba los dos comandos a continuación para iniciar SteamCMD. Asegúrese de tocar la tecla Intro después de cada comando:
cd steamcmd
- Aquí, debe reemplazarse con la ruta real donde extrajo SteamCMD, por ejemplo, C: / SteamCMD.
- Después de eso, debes usar los cuatro comandos a continuación para iniciar sesión en tu cuenta de Steam, forzar el uso del cliente de 32 bits y descargar la versión de 32 bits del juego. Presione Enter después de cada comando:
iniciar sesión @sSteamCmdForcePlatformBitness 32 force_install_dir ./7dtd/ app_update 251570
- Reemplaza los campos y con tus credenciales reales de Steam y espera a que se complete la descarga del juego. Después de eso, puedes ejecutar el juego manualmente desde la carpeta 7dtd dentro de SteamCMD Check para ver si el juego aún falla.