This is yet another Steam error which appears after launching a game but it was observed the error appears almost exclusively after launching Counter Strike Global Offensive or similar Valve games such as CS 1.6, Team Fortress 2, or Half Life.
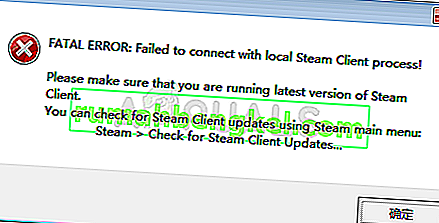
The error prevents users from launching the game and it was quite infamous for a while before various fixes started to emerge. Still, there isn’t a single fix you can pinpoint which will definitely solve the problem and you will have try them all out before settling for a single one.
What Causes FATAL ERROR: Failed to Connect with Local Steam Client Process?
The causes for this problem are so diverse and they are usually related to the standard Steam issues such as missing or corrupt game and Steam files which can usually be solved by verifying the game files, deleting certain cache folders, or by reinstalling the game or the complete Steam client.
In certain cases, not being in the Steam Beta program caused the problem which usually means Steam intended to fix the problem in the next update.
Solution 1: Verify Integrity of Game Files
The reason why this solution has its place at the top of the article is primarily because it’s easy to do it on your computer and it can solve the error in the simplest way possible. Some players have confirmed that, after the error started to appear, verifying the integrity of game files managed to find several files which were missing or corrupt and redownloading them helped fix the problematic game for good.
- Open your Steam PC client by double-clicking its shortcut on the Desktop or by searching for it in the Start menu simply by typing “Steam” after clicking the Start menu button or the Search (Cortana) button.

- After the Steam client opens, navigate to the Library tab in the Steam window at the menu located at the top of the window, and locate the problematic game’s entry in the list.
- Right-click the game’s icon in the library and choose the Properties option from the context menu which will open and make sure you navigate to the Local Files tab in the Properties window.

- Click the Verify Integrity of Game Files button at the bottom of the window and wait for the process to finish checking for your game files. The utility should download any missing files and you should reopen the problematic game afterwards to see if the “FATAL ERROR: Failed to connect with local Steam Client process” still appears.
Solution 2: Restart Steam Completely
This error can also happen sometimes if you have accidentally opened two or more instances of Steam which caused multiple Steam.exe processes to start on your computer. Also, various other Steam-related service can cause the problem to appear and players were able to solve it simply by restarting Steam completely.
- Make sure you quit the Steam client on your computer completely by clicking Steam >> Exit from the top-side menu with the Steam client open.

- An alternative solution if you have the Steam window closed is to locate the Steam icon in the system tray (lower left part of the screen). Note that you might need to click the upwards pointing arrow to see more apps.
- Right-click the Steam icon and choose Exit from the context menu which will appear. Now you will have to close all Steam-related processes in Task Manager. Use the Ctrl + Shift + Esc key combination by tapping the keys in the same time to open the Task Manager tool.
- Alternatively, you can use the Ctrl + Alt + Del key combination and select Task Manager from the blue screen which will appear with several options. You can also search for it in the Start menu.

- Click on More details at the bottom left part of the window in order to expand Task Manager and search for any Steam-related processes such as Steam.exe or GameOverlayUI.exe. They should be located right under Background processes. Select them one by one and choose the End task option from the lower right part of the window.
- Click Yes to the message which is going to be displayed which should warn about killing various processes and how it may affect your computer so make sure you just go with it.

- You should now reopen the Steam client by searching for it in the Start menu or by double-clicking its icon on the Desktop. Check to see if the error still appears after launching the game.
Note: Some users have reported that the problem can be solved simply by opening Steam as an administrator after closing it. After you have closed Steam completely and killed Steam-related processes, try following the steps below in order to run Steam as an administrator.
- Locate the Steam executable file and alter it by right-clicking its entry either on the Desktop or the Start menu or the Search results window and choose Properties from the context menu.
- Navigate to the Compatibility tab in the Properties window and check the box next to the Run this program as an administrator entry before applying the changes.

- Make sure you confirm any dialogs which may appear which should prompt you to confirm the choice with admin privileges and Steam should launch with admin privileges from now on. Open Steam by double-clicking its icon and try relaunching the game to see if the “FATAL ERROR: Failed to Connect with Local Steam Client Process” still appears.
Solution 3: Login and out of the Steam Client
This method is similar to the one above except that it’s faster and it only involves logging out of the Steam client and logging back it. Restarting Steam completely is better but sometimes the problem is related to your Steam account and that can only be fixed by logging out.
- Make sure you log out of the Steam account you are currently logged in with on your computer completely by clicking Steam >> Change Accounts from the top menu with the Steam client open.

- Confirm the dialog which will appear prompting you to confirm your choice as you will have to re-enter your accounts credentials.
- From the login screen which will appear, enter your proper username or email and password and wait for the Steam client to load. Try relaunching the problematic game and check to see if the issue still appears.
Solution 4: Uninstall the Game from Your Computer
Reinstalling the game on your computer can fix the problem as it did for certain users and we have to thank Steam from making the process appear quite easier than it is when uninstalling and installing games outside of Steam. This way you can simply redownload game files and Steam should take care of everything after a few clicks.
- Open your Steam PC client by double-clicking its shortcut on the Desktop or by searching for it in the Start menu simply by typing “Steam” after clicking the Start menu button or the Search (Cortana) button.
- After the Steam client opens, navigate to the Library tab in the Steam window at the menu located at the top of the window, and locate the problematic game’s entry in the list.
- Right-click the game’s icon in the library and choose the Uninstall option which will appear at the bottom of the context menu. Confirm the dialog asking for you to confirm your choice and wait for a while for Steam to delete the game files.

- After the game has uninstalled, stay in the Library tab in the Steam client, right-click the same game’s entry and choose the Install Game option. Choose a library folder to install the game and wait for it to install again. Check to see if the problem is solved.
Solution 5: Delete the Appcache Folder in Steam Root
Deleting this folder will reset the application cache for the Steam client and it can definitely faster than reinstalling the entire Steam client as that involves backing up game files. This useful didn’t for everyone but it worked for some people and they saved time since they didn’t have to uninstall the Steam client completely.
- Navigate to the Steam’s root folder in the File Explorer which can be accessed by opening a folder and clicking This PC or My Computer at the left side pane. Make sure the Steam client is closed completely.
- If you haven’t made any changes during the installation of the Steam client regarding the required installation folder, it should be Local Disk >> Program Files or Program Files (x86) depending on your OS.
- Additionally, if you have the Steam client’s shortcut on the desktop, you can simply right-click on it and choose the Open file location option from the context menu which will appear.

- The appcache folder should be available in this folder so make sure you right-click on it and choose the Delete option from the context menu. Confirm any dialogs and reopen Steam to see if the same error still appears
Solution 6: Opt in the Steam Beta Client
Steam beta clients usually hold the latest updates which are yet to be released to the general public. By enabling the Steam beta account in Steam settings, you can easily get the latest updates after restarting Steam and fix the problem sooner than everyone else simply by following the steps below.
- Open your Steam PC app by double-clicking the shortcut on the Desktop if you have one or by searching for it in the Start menu and clicking on the first Steam result.
- Click on the Steam button at the menu at the top of the client’s screen and choose Settings from the dropdown menu. In the Settings window stay in the Account tab and click the Change button under the Beta participation section.

- A new window should open so check again under the “Beta participation” section and click to open the drop-down menu. Choose the “Steam Beta Update” option and Apply the changes you have made. Restart your Steam client and try opening the game again and check for the “FATAL ERROR: Failed to connect with local Steam Client process” error.
Solution 7: Reinstall Steam
The last resort and the method users are often not so eager to perform is reinstalling the Steam client completely. The reason why people don’t want to perform this method at all is because uninstalling the Steam deletes all installed games by default and users with plenty of games might take an eternity to redownload them. That is why we recommend you follow our instructions where you won’t have to redownload a single game and the problem should be solved as well!
- Open your Steam PC client by double-clicking its shortcut on the Desktop or by searching for it in the Start menu simply by typing “Steam” after clicking the Start menu button or the Search (Cortana) button.
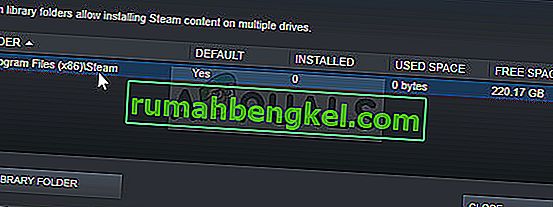
- After the Steam client opens, click the Steam button at the top right part of the window and choose Settings. Navigate to the Downloads tab in the Settings window and click on Steam Library Folders.
- Here you should see a list of all libraries you currently use and the folders you should look for when backing up. Since the default folder is C >> Program Files (x86) >> Steam >> steamapps, let’s see how to back it up.
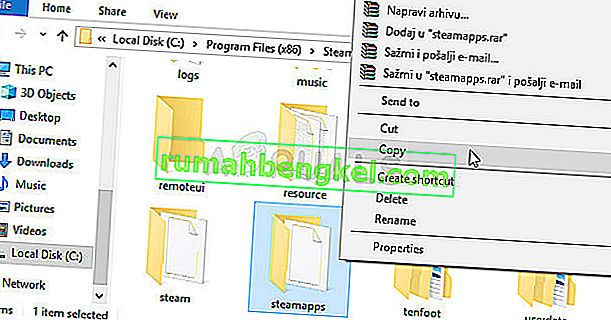
- Navigate to the location above by clicking to open any folder or the File Explorer and clicking This PC or My Computer at the right pane. After that, locate the location above and find the “steamapps” folder.
- Right-click the folder and choose the Copy option from the context menu which will appear. Navigate to a location outside the Steam folder on your computer and paste the folder by right-clicking and choosing Paste. The best location would be the Desktop.
- Repeat the same process for all library folders. After uninstalling Steam, you will have to add the folders again as the Steam library folders as you did the first time.


After you have backed up your game installations, the next step is to uninstall Steam from your computer. This can be done easily using the Settings app or the Control Panel.
- First of all, make sure you have logged in with an admin account as you won’t be able to uninstall programs using any other account privileges.
- Make sure you have performed the steps above for each library folder you have on your computer and take note of their locations so that you can add them back once Steam is reinstalled.
- Click on the Start menu and open Control Panel by searching for it. Alternatively, you can click on the gear icon in order to open settings if you are using Windows 10.
- In Control Panel, select to View as: Category at the top right corner and click on Uninstall a Program under the Programs section.

- If you are using the Settings app, clicking on Apps should immediately open a list of all installed programs on your PC.
- Locate the Steam entry on the list and click on it once. Click on the Uninstall button above the list and confirm any dialog boxes which may appear. Follow the instructions on-screen in order to uninstall Steam and restart your computer afterwards.