Steam Cloud proporciona una forma fácil y transparente de guardar los datos de tu juego en un sistema de almacenamiento remoto. Los archivos especificados en la configuración de Auto-Cloud o si están escritos en el disco se replicarán automáticamente en los servidores de la nube de Steam (usando la API de Cloud) después de que exista el juego.

Esto es particularmente útil si el usuario cambia de computadora. El progreso del juego se reanudará mediante la API de la nube o leyendo directamente desde el disco. Los archivos se descargarán automáticamente antes de que se inicie el juego, ya que ya habría ingresado sus credenciales de Steam. El trabajo principal de Steam Cloud es garantizar que todos los archivos estén sincronizados en todas las computadoras que usa un usuario.
Los usuarios tienen la opción de deshabilitar toda la sincronización en la nube presente en la Configuración de Steam en el cliente. Los usuarios también tienen la flexibilidad de desactivar la sincronización en la nube por juego. Pero antes de continuar con las soluciones, actualice el cliente Steam a la última versión.
¿Cuáles son los diferentes métodos para utilizar Steam Cloud?
Steam ofrece dos métodos diferentes para utilizar Steam Cloud.
Primero está la API de Steam Cloud. La API de Cloud proporciona una serie de funciones que te permiten integrar directamente Steam Cloud en tu juego. La API de la nube también realiza la tarea de aislar los archivos individuales de los usuarios de Steam entre sí y también proporciona un mejor control sobre la nube de Steam en su conjunto.
El segundo es Steam Auto-Cloud. Esta función se diseñó principalmente para juegos heredados en los que era difícil usar la API de la nube. Es una forma rápida de comenzar con Steam Cloud, pero carece de la flexibilidad y la potencia que proporciona Steam Cloud API.
Los desarrolladores recomiendan utilizar la API de la nube en lugar de Steam Auto-Cloud, ya que proporciona una integración y personalización más profunda y efectiva. Le permite aprovechar al máximo la nube de Steam.
¿Cómo resuelvo un conflicto de Steam Cloud?
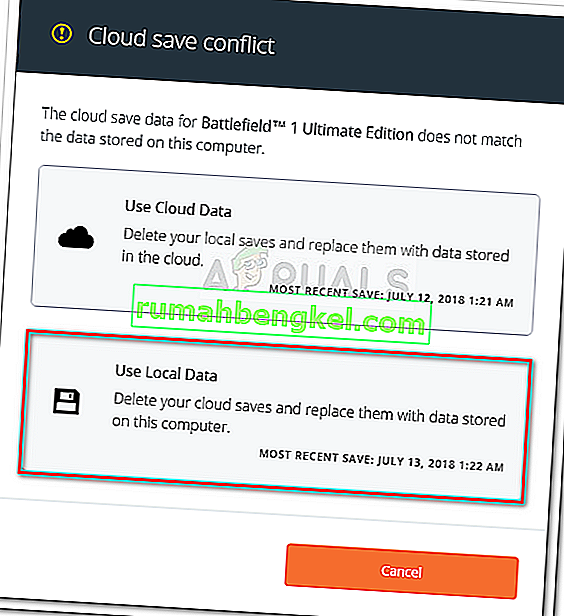
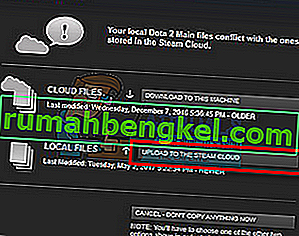
Un conflicto de Steam Cloud ocurre cuando el contenido de Steam Cloud no coincide con los archivos del juego local almacenados en su disco duro. Esto puede ocurrir en la máquina que estaba usando en ese momento o puede haber ocurrido en otra máquina anteriormente. Debido a que el archivo se modificó en dos ubicaciones diferentes sin la sincronización entre ellas, Steam no puede determinar qué archivo conservar.

Lo más probable es que elija el archivo que se modificó más recientemente. Lo que significa que se guardarán los últimos desarrollos en su juego. Debe inspeccionar cuidadosamente los datos de la vista previa en la ventana. Revisa cuidadosamente la fecha y hora del contexto y haz que corresponda con la última vez que jugaste un juego en Steam. Este contexto puede ayudarlo a determinar qué versión conservar.
Tenga en cuenta que jugar juegos en modo fuera de línea evitará que sus juegos se sincronicen y esta es la causa más probable del conflicto de Steam Cloud.
¿Qué sucede si Steam no puede sincronizar archivos con la nube?
Este error indica que Steam no pudo sincronizar sus archivos locales con Steam Cloud. Puede ser un problema temporal al que se enfrentan los servidores de Steam Cloud. Puede verificar el estado de Steam Cloud en el sitio web de Steam para asegurarse de que el problema está de su lado.

Si el servicio en la nube de Steam está funcionando perfectamente, significa que el problema está al final. Puede verificar su conexión Steam y solucionar problemas. También puede comprobar si solo usted tiene problemas para sincronizar con Steam Cloud.
Si ignora el mensaje y hace clic en "Jugar", podría causar un posible conflicto entre sus archivos locales y Steam Cloud. También puede resultar en la pérdida de progreso y datos del juego.
¿Qué sucede si pierdo un archivo o progreso después de cambiarme a una computadora diferente?
Si te falta tu progreso más reciente y has verificado dos veces que el juego está usando Steam Cloud usando la Configuración, significa que Steam no pudo sincronizar tus datos correctamente o que la sincronización provocó que tus datos anteriores se cargaran a la Nube.
Es posible que su archivo original o el progreso aún se encuentre en la máquina anterior y no se pudo sincronizar. Es posible que si inicia Steam en esa computadora, se mostrará su progreso. Si lo hace, se actualizará automáticamente en todas las demás máquinas conectadas con su cuenta de Steam.
Además, muchos juegos no utilizan las instalaciones de Steam Cloud. Puedes consultar la página oficial del juego si el soporte de Steam Cloud está disponible. Si no es así y no tiene acceso a la máquina anterior, significa que su progreso se ha perdido y no hay forma de recuperarlo.
¿Cómo eliminar archivos almacenados en Steam Cloud Servers?
Steam Cloud se utiliza para hacer una copia de seguridad de cada uno de los progresos de su juego para que no pierda su progreso si accede al juego desde cualquier otra computadora. Puede confirmar que la nube está guardando su progreso utilizando el siguiente método.
Comprueba si se está realizando una copia de seguridad de tu juego.
- Abra su cliente Steam . Abra su Configuración presionando el botón Steam presente en la esquina superior izquierda de la ventana y seleccionando la opción.
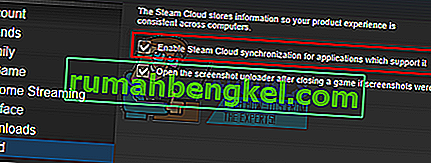
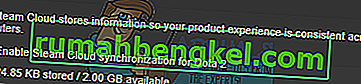
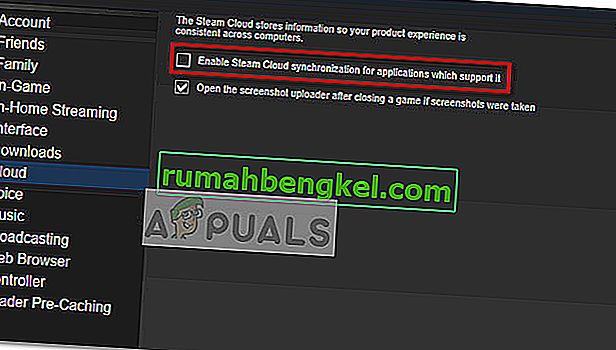
- Abra la pestaña Nube presente en el lado izquierdo de la pantalla. Compruebe si la opción " Habilitar la sincronización de Steam Cloud para las aplicaciones que lo admiten " está marcada.
- A continuación, haga clic en la pestaña Biblioteca presente en la parte superior del cliente Steam. Aquí se enumerarán todos sus juegos.
- Haz clic derecho en el juego y selecciona Propiedades . Luego navegue hasta la pestaña Actualizaciones presente en la parte superior de la ventana.
- Aquí, en la parte inferior de la ventana, verás la opción " Habilitar la sincronización de Steam Cloud para [nombre del juego] ". Asegúrese de que la opción esté marcada .


Si tiene ambas opciones habilitadas, significa que Steam Cloud está respaldando su juego y también podemos eliminar los datos.
¿Qué es el mecanismo de respaldo?
Lo primero que debes saber es que existen tres versiones de los datos guardados del juego
- La versión original se almacena en la carpeta de AppData ( D1 ).
- La versión en la nube se almacena en la ubicación Steam / userdata / SteamID / AppID ( D2 ).
- La versión en la nube almacenada en los servidores en la nube de Steam ( D3 ).
Tenga en cuenta las anotaciones (D1, D2, D3) que usamos, ya que nos referiremos mucho a ellas en el futuro.
Cuando inicias el juego por primera vez, D1 se crea automáticamente. Una vez que hayas terminado de jugar, los datos del juego se actualizan en D1 y se copian automáticamente en D2. Después de esto, D2 se sincroniza con D3, cargando así todo el contenido del juego.
Si inicias tu juego desde otra computadora por primera vez, si Steam tiene D3 en sus servidores pero no detecta D2 en la computadora, automáticamente descargará los datos y copiará D3 a D2. Steam Cloud también descarga automáticamente los datos faltantes cada vez que inicia Steam.
En pocas palabras, el dato más importante para nosotros es D2. Si podemos manipularlo, podemos eliminar con éxito los datos que desea eliminar.
Nota: algunos juegos no tienen D1 y guardan sus datos directamente en D2. Si bien algunos juegos no usan D2 como medio y cargan los datos a la nube directamente desde D1.
¿Qué son los contenidos de datos de usuario?
En el directorio Steam / userdata, debe tener una carpeta correspondiente a su SteamID (puede verificar cuál es su Steam ID leyendo nuestro artículo sobre él). Después de abrirlo, se crearán carpetas para cada juego que juegues. Se identificarán mediante su AppID (AppID se puede verificar fácilmente visitando el juego en la tienda Steam y extrayéndolo de la URL). En esta carpeta del juego, encontrarás dos entidades.
- remotecache.vdf: este archivo describe todas las propiedades de los archivos que se encuentran en la carpeta remota.
- Carpeta remota . Contiene todos los archivos que están sincronizados con su servidor Steam Cloud.
Eliminar datos de la nube
In this method, we will be following two important steps. We will first bring up the Steam Cloud conflict notification and then delete the Cloud files.
Do note that you would have to follow these steps game by game to delete all of the Steam cloud content.
First, we need to delete the AppID folder from your Steam directory. After you restart your computer and Steam, Steam will automatically re-create the folder. We need to perform this step to ensure that the Steam Cloud is working perfectly and we can go ahead with the part of deletion.
- Open your Steam directory. The default location for your Steam installation is
C:\Program Files (x86)\Steam
- Search for a folder of AppID and Delete it. Then restart your computer and Steam. Start a game for a few minutes. Make sure that you have a working internet connection.
- Navigate back to the Steam directory and check if the AppID folder is back. If it is, it is confirmed that your Steam Cloud is working perfectly and we can proceed with the method.
Bringing Up Steam Cloud Conflict Dialogue
The first part of the solution is probably the most difficult. To delete all your Steam Cloud data, it is necessary to bring the conflict dialogue. Without it is not possible to delete the data present in your Cloud. Steam Cloud conflict occurs when the Cloud files differ from the data present on your hard drive.
There are two methods to bring about this conflict:
Method 1:
- Make sure that your Steam Cloud is enabled by following the steps mentioned above. Exit Steam completely by ending all the processes starting with Steamclientbootstrapper using the task manager.
- Now will alter all the files in the location
Steam\userdata\SteamID\AppID\remote
The objective is to make sure that all the files are different from those uploaded to the Steam cloud. We can’t simply delete the files from this location as Steam will automatically notice that the files are missing and download the same ones from the Cloud servers. We can achieve our task by corrupting them and making them 0-byte files.
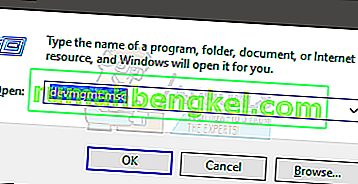
- Navigate to
Steam\userdata\SteamID\AppID\remote
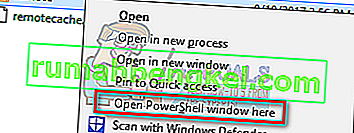
- Now hold shift and right-click on your remote folder. Select the option “Open PowerShell window here”.
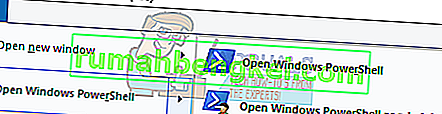
- You can also open PowerShell when in the folder by clicking the File option present at the top left side of the screen and selecting “Open Windows PowerShell as administrator”.
- Once PowerShell is opened, type the exact text written below


clc –path “C:\Program Files (x86)\Steam\userdata\SteamID\AppID\remote\*"
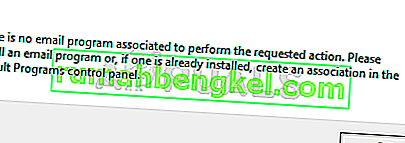
If you fail to write the correct code, you will get an error like this

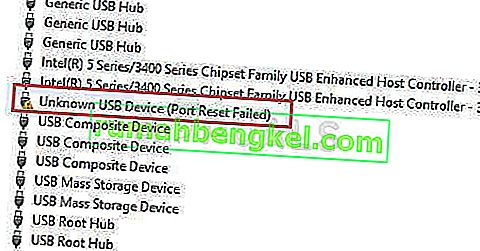
If you correctly type in the line there will be no confirmatory message and you will get a window like this.

Start your Steam and there will be the conflict windows present on your Steam client.
Method 2:
This is an easier method as compared to the earlier one but it isn’t that efficient.
- Open your Steam client. Open its Settings by pressing the Steam button present at the top left corner of the window and selecting the option.
- Open the Cloud tab present on the left side of the screen. Uncheck the option “Enable Steam Cloud synchronization for the applications which support it”.

- Now navigate to your Stream directory as you did earlier and delete all files present in the folder of AppID. The file path for deletion is
Steam\userdata\SteamID\AppID.
- Now start the game to make new and different files in the file location.
- Exit the game and Steam completely by ending all Steam processes in the task manager (end steamclientbootstrapper first).
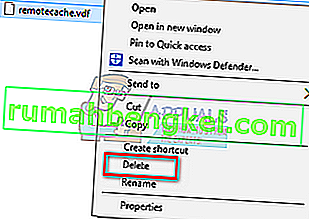
- Now delete the remotecache.vdf file present in the location
Steam\userdata\SteamID\AppID
- Start your Steam.
- Head over to the client’s Settings and enable the cloud.

Now a Steam conflict dialogue will come forth and we can proceed with the remaining method.
Deleting Cloud files
Once the Cloud conflict error is forth, don’t click any option and follow the instructions below.
- Navigate to the following file path
Steam\userdata\SteamID\AppID
and delete all the files in it. There will be two files (remote folder and remotecache.vdf). Delete both of them.
- Now go back to the conflict window and select the option of “Upload to the Steam Cloud”. Now Steam will sync your AppID folder while there will be nothing in it and the previous data on your Steam Cloud will be deleted.
- Now the game will start automatically but it will create new files that will be synced to your Steam cloud when you close it. We can prevent it from happening by pressing alt + tab. This will open the open windows on your screen. Select the Steam client from the list of windows.

- Once you are in the Steam client, open the client’s Settings. Navigate to the Cloud tab and uncheck the line which enables cloud.

- Now return to the game and exit. No files will be synced to your Steam cloud.
- Exit Steam and delete the AppID folder as we did before.


How to Make Sure If it Worked?
Remember how we checked at the beginning of this method if the Steam Cloud was running as expected by deleting the AppID folder and checking if it was made again. If there is no file present in the Steam cloud, there will be no file downloaded to your computer.
- Enable the Steam cloud as we did in the guide.
- Exit Steam completely by using the task manager.
- Delete the AppID folder (if you didn’t in step 2).
- Now check D3 (these are the cloud files) and compare them with D2 (local files on your computer). If there is nothing in D3, there will be nothing in D2 too!
- Check the following directory Steam\userdata\SteamID
No new AppID folder would have been created.
You can also check by logging Steam in on another computer and checking if the files exist.
If you make it till here without any problems, you have successfully deleted all the files on your Steam Cloud.
How to Delete Steam Cloud Saves from OS X
The procedures above can also be replicated on OS X and older Macs to a slight extent. By following the steps below, you will be able to delete your local saves. You can then disable the Steam Cloud synchronization from the Steam application, start a new game and create a few new saves. Then, when you return to re-enable the Steam Cloud synchronization features, the client will ask you which saves do you want to use. You can then choose the new ones which will delete and replace your old saves from the cloud.
To make things even clearer, here’s a step-by-step guide through the whole thing:
- Open your Steam application and go to Steam > Settings via the ribbon at the top of the window.
- In the settings menu, click on the Cloud tab and uncheck the box associated with Enable Steam Cloud synchronization for applications that support it.
- Close Steam completely and open your Finder app.
- Go to Library > Application Support > Steam > SteamApps > Common and open the folder of whichever game you want to delete the save files.
- Next, open the SAVE folder to reveal the saves of the game.
Note: If the location specified above doesn’t land you to the save files, try the following locations but mind the placeholders:
Users / *Your username* /Library / Application Support / *Game Folder* / Game Documents / *Game* / GameSaves Users/ *Your username* / Library / Application Support / Steam / userdata / *GameNumber* / remote Users/ *Your username* / Library / Containers / *Game Folder* / Data /Library / Application Support / *Game* / GameDocuments / *Game* / gamesaves
- Once you manage to identify and delete the local saves from the game you’re targeting, open the Game and create a few new saves.
- Exit the game, open steam and return to Steam > Settings > Cloud. From the cloud tab, re-enable the checkbox next to Enable Steam Cloud synchronization for applications which support it and click the OK button below.
- Steam will ask you whether you want to use the newly created local saves or the ones that you already have on the cloud. Choosing to use the new ones will delete the old saves that you currently have on Steam Cloud.