OBS Studio es un software de código abierto que permite a los usuarios transmitir sus juegos o pantallas de forma profesional. Tiene plataformas tanto para macOS como para el sistema operativo Windows. OBS suele ser utilizado por jugadores de alto nivel que prefieren un mayor control sobre su pantalla compartida en comparación con el software de grabación de pantalla convencional.

Un problema ha plagado a OBS durante bastante tiempo en el que los usuarios experimentan una 'pantalla negra' al intentar compartir sus pantallas en línea. Este problema se ve principalmente en plataformas y sistemas Windows donde hay dos opciones de gráficos, es decir, dedicadas e integradas. En este artículo, veremos todas las soluciones de por qué ocurre este problema y cuáles son los pasos para resolverlo.
¿Qué causa una pantalla negra en OBS Studio?
Hicimos una encuesta exhaustiva y analizamos todos los casos de usuarios en los que se producía la pantalla negra al transmitir con OBS. Según nuestro análisis, nos encontramos con varios culpables diferentes que podrían estar causando el problema. Algunos de ellos se enumeran aquí:
- Interferencia de gráficos dedicados: cada vez que inicias cualquier aplicación o juego, el sistema operativo tiene que decidir si asignar recursos desde la tarjeta gráfica dedicada oa través de los gráficos integrados de la placa base normal. Esta selección puede tener un efecto adverso en términos de la mecánica de ejecución y es posible que OBS no pueda transmitir correctamente.
- Privilegios de administrador: dado que OBS comparte su pantalla completa, es posible que en algunos casos la computadora restrinja su acceso y, por lo tanto, no pueda mostrar su contenido. Por lo general, con solo iniciar la aplicación con acceso administrativo se resuelve el problema al instante.
- Conflicto en la aplicación de 32 y 64 bits: OBS tiene dos versiones de sus aplicaciones, a saber, 32 y 64 bits. Se debe seleccionar la versión correcta según el tipo de sistema operativo instalado en su computadora. Si no es así, la aplicación no será compatible y no funcionará correctamente.
- Problemas de compatibilidad: también nos encontramos con varios casos en los que OBS no era compatible con la última versión de Windows. Aquí, iniciar la aplicación en modo de compatibilidad obliga a la aplicación a iniciarse y funcionar como se esperaba.
- Overclocking: el overclocking puede mejorar el rendimiento de su PC, pero también tiene sus efectos adversos en las aplicaciones. Puede intentar deshabilitar el overclocking y ver si esto ayuda en algo al problema.
- Software en conflicto: también puede haber otro software de captura similar ejecutándose en segundo plano. Este software puede entrar en conflicto con OBS y provocar una carrera por los recursos, lo que definitivamente hará que OBS funcione mal y no funcione correctamente.
- Opciones de captura: Hay varias opciones de captura disponibles en OBS, por ejemplo, pantalla completa o una ventana específica, etc. Se debe elegir la correcta al capturar contenido.
- PC en estado de error: nunca se puede tachar la posibilidad de que el PC esté en estado de error. Esto suele ocurrir cuando no apaga la computadora durante mucho tiempo. Simplemente el ciclo de energía soluciona el problema en cuestión.
Asegúrese de seguir las soluciones desde arriba y trabajar hacia abajo de manera efectiva. Están ordenados en términos de dificultad y eficiencia. ¡Feliz solución de problemas!
Solución 1: Apague y encienda su computadora
Antes de que empecemos a solucionar problemas de forma exhaustiva, vale la pena apagar y encender la computadora. Hubo varios casos en los que el simple ciclo de encendido resolvió la pantalla negra de OBS al instante. El ciclo de energía implica apagar la computadora por completo y también quitar la fuente de energía. Esto obliga a la computadora a eliminar todas las configuraciones temporales, por lo que cada vez que la inicie de nuevo, todo se inicializará de nuevo.
- Apague su computadora correctamente.
- Una vez que esté apagado, saque la toma de corriente o si está usando la computadora portátil, saque la batería .
- Ahora presione y mantenga presionado el botón de encendido durante un par de segundos. Esto asegurará que se agote toda la energía.
Después de esperar de 2 a 4 minutos, vuelva a conectar todo y verifique si el problema se resuelve.
Solución 2: selección de la versión correcta de OBS Studio
OBS generalmente viene en dos versiones, es decir, 32 y 64 bits. El software se envía en dos versiones porque el sistema operativo Windows también se envía en dos versiones. Una gran diferencia entre los procesadores de 32 bits y los de 64 bits es la cantidad de cálculos por segundo que pueden realizar, lo que afecta la velocidad a la que pueden completar las tareas. En esta solución, navegaremos al directorio de instalación de OBS y seleccionaremos la versión correcta del software después de verificar su versión de bits.
Primero, verificaremos la versión del sistema operativo instalado en su computadora.
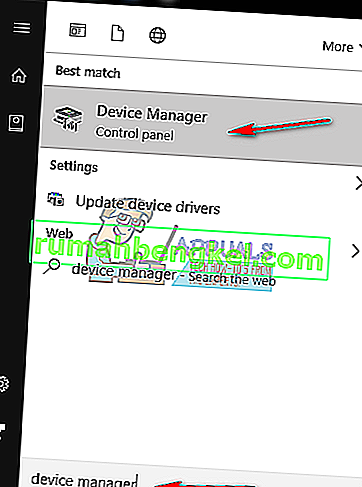
- Haga clic con el botón derecho en Esta PC y seleccione Propiedades .

- Una vez en las propiedades de la computadora, verifique debajo del subtítulo del Sistema y verifique el tipo frente al Tipo de sistema . Anote el tipo de sistema operativo y continúe con las instrucciones a continuación.

Ahora navegaremos a la carpeta de instalación de OBS e iniciaremos la versión correcta de la aplicación de acuerdo con la arquitectura de bits en su computadora.
- Presione Windows + E para iniciar el explorador de archivos. Ahora busque OBS en el cuadro de diálogo y abra la ubicación del archivo como se muestra a continuación en la imagen.

- Ahora seleccione y abra la versión correcta de la aplicación según la versión de bits de su sistema operativo. Compruebe si el problema se ha resuelto.
Solución 3: Cambiar el modo de compatibilidad
Recibimos informes mixtos de la opción de modo de compatibilidad presente en la aplicación. Según algunos usuarios, la aplicación no admitía la última versión de Windows, por lo que tuvieron que cambiar la compatibilidad a Windows 7, mientras que algunos usuarios informaron que deshabilitar el modo de compatibilidad resolvió el problema al instante. Aquí puede probar ambos métodos y comprobar cuál funciona para usted. Si no es así, revierte la configuración a la predeterminada y continúa con las otras soluciones.
- Presione Windows + S, busque OBS, haga clic derecho en la aplicación y seleccione Abrir ubicación de archivo .

- Ahora haga clic derecho en el ejecutable y seleccione Propiedades .

- Una vez en propiedades, seleccione la pestaña Compatibilidad y marque la opción Ejecutar este programa en modo de compatibilidad para . Ahora puede elegir Windows 7 u 8.

- Guardar los cambios y salir. Ahora intente iniciar la aplicación y vea si el problema está resuelto.
Solución 4: concesión de derechos de administrador
Otro problema por el que es posible que no pueda transmitir su pantalla o juego correctamente es porque su aplicación no tiene los privilegios de administrador adecuados. Dado que OBS está compartiendo todo su contenido y uso de la computadora en línea, es esencial que le haya otorgado derechos de administrador. En esta solución, lo haremos y comprobaremos si esto resuelve el problema. Incluso si no es así, asegúrese de mantener la opción marcada todo el tiempo.
- Navegue a las propiedades ejecutables de OBS como lo hicimos en la solución anterior.
- Ahora haga clic en la pestaña Compatibilidad y marque la opción Ejecutar este programa como administrador .

- Aplicar cambios y salir. Reinicie su computadora y ejecute OBS nuevamente. Ahora compruebe si el problema está resuelto.
Solución 5: selección de la GPU correcta para los recursos
Otro fenómeno interesante con el que nos encontramos fue que no seleccionar la GPU correcta de acuerdo con la captura que está utilizando causó varios problemas, incluida la pantalla negra. El desglose de qué GPU seleccionar según la pantalla seleccionada es el siguiente:
- Captura de juegos: gráficos dedicados (NVIDIA o AMD).
- Captura de monitor / pantalla: GPU estándar de Intel
Note: This solution is only for users who have a dedicated graphics card installed on their computer.
Here we will signify the methods on how to cater to both the situations. Make sure that you follow them according to your case.
- Right-click anywhere on your screen and select NVIDIA Control Panel.
- Once in the control panel, navigate to Manage 3D settings and click on Program Settings.
- Once in program settings, select the OBS display capture. If you are not able to find the entry, click on Add and look up the software by navigating to its installation directory and selecting the executable from there.

- Now according to the type of capture you are doing (game or monitor), select the correct graphics processor for the program. In the case down below, NVIDIA’s processor is selected.

- Save changes and exit. Now restart your computer and launch OBS again. Check if the black screen issue is resolved.
Solution 6: Changing Drive Permission Settings
If your OBS is installed in your primary drive (C), there are chances that probably even your user might have not have full permissions to edit and modify its contents. This is the usual case and the reason why a conventional user is not allowed access to the drive is because of security reasons because all the core operating system files are present. However, according to some user reports, changing the ownership settings of the drive solved the issue instantly. Make sure that you are logged in as an administrator before following this solution.
- Press Windows + E to launch the File Explorer. Now right-click on your C drive (or whichever drive is set as your main operating system disk) and select Properties.
- Select the Security tab and then click on Edit in front of permissions.

- Now select the option of Authenticated users and select the checkbox of Full control.

- Press Apply to save changes and exit. Restart your computer and start OBS again. Check if the issue is resolved.
Solution 7: Changing Settings of OBS
Another workaround to consider is changing some specific settings of OBS. Usually, OBS allows users to set the configurations according to their own preferences or will. However, in some cases, the custom settings might conflict with the software and cause the black screen. Here we have listed down some of the changes in settings that you have to do in order for OBS to run in optimal settings.
Mode: *Select according to your preference* Screen: *Select according to your game* Priority: *Usually the default one suffices* Sli/crossfire: Check (You can also try unchecking this one later) Force scaling: Uncheck Transparency: Uncheck Framerate lock: Uncheck Record cursor: Check Anti-cheat: Uncheck Overlays: Uncheck
After you have made changes to the settings of OBS, restart it and check if you can stream your screen/games properly without any issues.
Note: You can also change the mode from “Capture any fullscreen application” to “Capture specific window“.
Solution 8: Enabling Multi-adapter compatibility
OBS has a setting of Multi-adapter compatibility which is meant for computers involving SLI or Crossfire technology. SLI/Crossfire is technologies by NVIDIA/AMD which allows users to connect two graphics cards instead of one and utilize them both in your gameplay or applications. Enabling this feature seemed to have fixed the issue of black screen in OBS instantly.

The funny thing is that this fixed the black screen in computers that don’t even have SLI/Crossfire technology installed. To conclude, we can safely say this is a bug in OBS and you have to enable multi-adapter compatibility whether or not you have SLI/Crossfire. You can easily enable this option by selecting the stream and clicking on the gears icon. A new window will pop up from where you can check the option.
Solution 9: Disabling Overclocking
Overclocking allows you to increase the clock rate of your processor until it reaches the threshold temperature set by the manufacturer. Once it reaches the temperature, the clock speed returns back to default so it is cooled down. After it reaches the optimal temperature, its clock speed is increased again and the cycle continues. Overclocking allows users to have better framerates and performance but they aren’t without their share of issues.

We observed that PCs that had overclocking enabled were having the black screen issue in OBS. You should try disabling overclocking and also overclocking related software such as MSI Afterburner and try launching OBS again. If the black screen issue is resolved, consider disabling overclocking for good whenever you are using OBS.
Note: Also try disabling Overlay from GeForce Experience and Windows game bar features. Take into account any additional software features which may provide additional controls over games or video.
Solution 10: Checking for conflicting software
Another reason why you might be experiencing the black screen on your OBS software is that you have additional software running in the background which is also related to screen capture and video recording. This is a very common scenario for users where they ‘think’ that the other third-party software is not running but in reality, it is in the background. In this solution, we will go through all the different software installed on your computer and uninstall all extra software which might be causing the issue.
- Press Windows + R, type “appwiz.cpl” in the dialogue box and press Enter.
- Once in the application manager, search for any recording software which you might have installed on your computer. Right-click on it and select Uninstall.

- You should also check your taskbar for any extra applications running in the background. Right-click on each entry and exit the application.

- After you are absolutely sure that no program is running the background, run OBS again and check if the issue is resolved.
Solution 11: Reinstalling the application
If all the above methods don’t work and you are still unable to stream your game/screen successfully using OBS, you should consider reinstalling the application entirely. It is possible that you have a corrupt/outdated copy with issues with several modules. All your preset configurations will be lost during this solution so make sure that you have saved all the work that you need.
- Press Windows + R, type “appwiz.cpl” in the dialogue box and press Enter.
- Once in the application manager, search for OBS, right-click on it and select Uninstall.

- Select both options (one of them will be preselected) and click on Uninstall.

- Restart your computer. Now navigate to OBS Studio’s official website and download the latest version from there. Install it and check if the issue persists in the fresh copy.